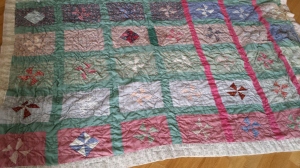
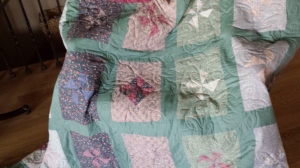
It is so important to me that our family quilts be maintained. The “Forever” in our name, ForeverQuilt, represents to us the heritage of your quilt.
The talent and skill level of its maker, the materials used, but most of all the love and time that went into the quilt all tell a story. Quilts are an American thing to me. Made mostly, although less and less exclusively by women, I have a deep respect for each and every quilt.
When I restore a quilt, I strive to retain the essence of the quilt. If a quilt looks as though it was a beginner’s project, I don’t try to “fix it” so it looks as though an experienced quilter did the work. That is not fair to the maker. We all get better at the skills we take on, and each step is, well, sacred.
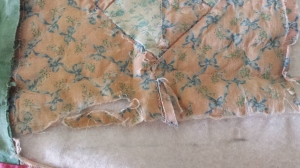
1. The first step is assessing the strengths and weaknesses of the quilt. Look for rips, weak fabric, material rot and such. Remedies can include eliminating sections, combining sections or using interfacing products to shore up weak areas.
Here is a short video to explain the assessment step:
https://www.youtube.com/watch?v=ubwGdx0YRCY&feature=youtu.be
2. Repair damaged areas. I began by using double sided fusible (you use an iron to make it adhere) interfacing.
3. After I had repaired the damage at the hem, I put the quilt on my longarm frame and basted it heavily. You can do this step by hand or on your home sewing machine. Be gentle and get good coverage because the next step is washing the quilt.
I recommend a hypo-allergenic detergent. So, of course, that is one without coloring or scent. I think these sorts of detergents brighten up fabrics better, but that could just be all in my head. Go ahead and add an oxygenating agent-they usually have “oxi” or “oxy” in the name.
With all the basting I put in this quilt, I had no problem throwing it in the dryer. If you don’t want to do that, make sure you lay it flat (cotton “grows” as we all know) and get some air circulating around it.
4. Now comes the step when I had seconds thoughts what to do next. The repairs I had made with the fusible interfacing held, but the fluffing up of the quilt showed off the weakness of those areas. The batting puffed up nicely but that was not so kind to the repairs.
What to do next?
My customer had told me that I could just cut off the border and “stick some new material on”. Well, that is not an option, as most of us already know. New fabric sewn to old makes the old even more vulnerable to tearing. However, his permission let me know that he wanted a fresh look for the finished product. He’s sentimental about the memories, not every last stitch. And that is the right way to look at a restoration project if it is not a museum piece.
5. Something’s gotta go. Time to rob from Peter to pay Paul. I call this step “cannibalizing.”
However, before taking something away, I put something in. Taking the quilt sandwich apart, I then had the three elements: top, batting, and backing. I gave the quilt a brand new 80/20 batting. The 20% polyester will add stability and “poofiness” which I believe will cheer it up even more.
Interestingly, it seems to me that often there is a sort of equity in a patchwork quilt. Perhaps it is because the quilt sits on a bed in the sunlight. One side takes the damage while the other is protected. I like to think that God really, really likes quilts and helps to rescue them. 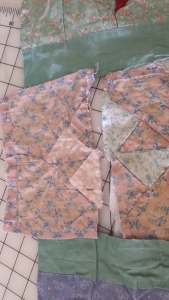
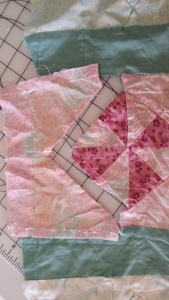
A couple of good things here. 1) The fabric is brighter. Great news.
2) On the two worst patches, the strips on the opposite sides of the quilts were okay in places where the opposite patch was strong. So the quilt was shortened by one row. One row rescued the other. And since the back of the quilt, being white, was very dingy at the edges (the washing highlighted this compared to the colored side). So instead of bringing the back to the front to bind, I will bring the front to the back. I think this will freshen up the quilt. Instead of adding new fabric, the existing quilt top will give the facelift the quilt needs for an eye-popping fresh start.
6. Put the quilt top, batting, and back on the frame. Quilt using a pattern that keeps the “mood” of the quilt. I chose a pinwheel pattern because the piecing is a pinwheel motif.
7. Remove the restored quilt from the frame. Hem it.
8. Enjoy!


